Five Easy Steps To Dye Eggs

Five Easy Steps To Dye Eggs
Credit to Canyon Dubis

Dyeing eggs is a fun and simple spring activity for anyone of any age. Many people who celebrate Easter dye eggs to hide around in their yard. This simple activity has become a yearly tradition for many families.

“Dyeing eggs has always been a tradition in my family,” freshman Charlotte Hillier said. “We’ve done it since I was young and it’s just something fun we always do together.”

When dyeing eggs there are infinite ways to dye them. This includes using shaving cream, coloring paper eggs or even hydro-dipping them. Follow along to learn how to dye the eggs using vinegar and a kit that you can get from any craft store.


What you will need:

  1. White Vinegar
  2. Water
  3. Egg Dyeing Kit (includes color tablets, egg dipper and stickers) (may include dyeing cups, drying tray, and wax crayon)
  4. Wax Crayon (if not included in kit)
Step 1: Preparing the Eggs

Place the desired number of eggs into a large pot and fill the pot with water covering the eggs. Place the pot on the stove turning the heat to high and allow the eggs to boil for five minutes. Then turn the stove off and leave the pot of eggs in the hot water on the stove for an additional 10-12 minutes. Next pour the hot water into the sink leaving the eggs in the pot. After that pour cold water over the eggs and let them sit for 15 minutes. Finally pour the cold water into the sink and gently dry off the eggs. This will leave you with hard boiled eggs which are ready to be dyed.

(Credit to Canyon Dubis)
Step 2: Preparing the Dye
Step+2%3A+Preparing+the+Dye
(Credit to Canyon Dubis)

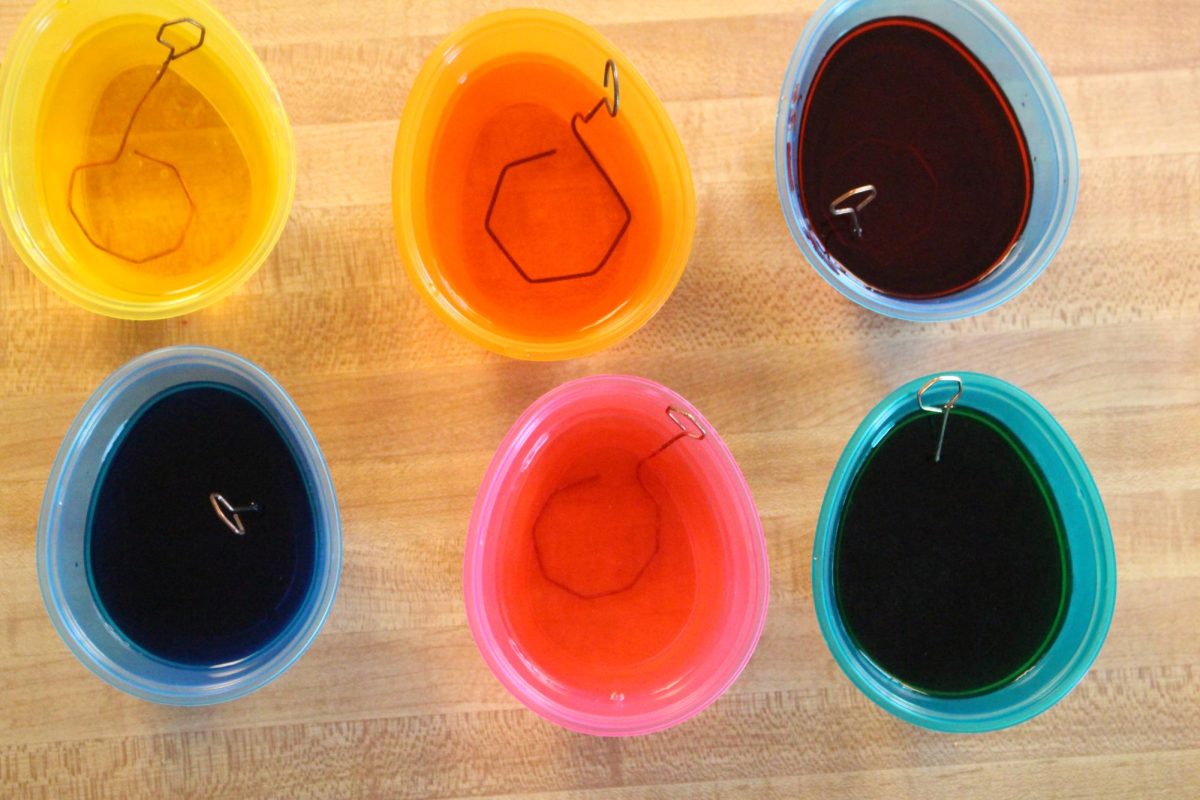
Pour one tablespoon of white vinegar and one tablespoon of room temperature water into a disposable cup. Add a color tablet into the mixture and stir until the tablet is dissolved. Once dissolved, add one cup of room temperature water and stir. Repeat for each color of dye you wish to use.

Step 3: Dyeing the Eggs
Step+3%3A+Dyeing+the+Eggs
(Credit to Canyon Dubis)

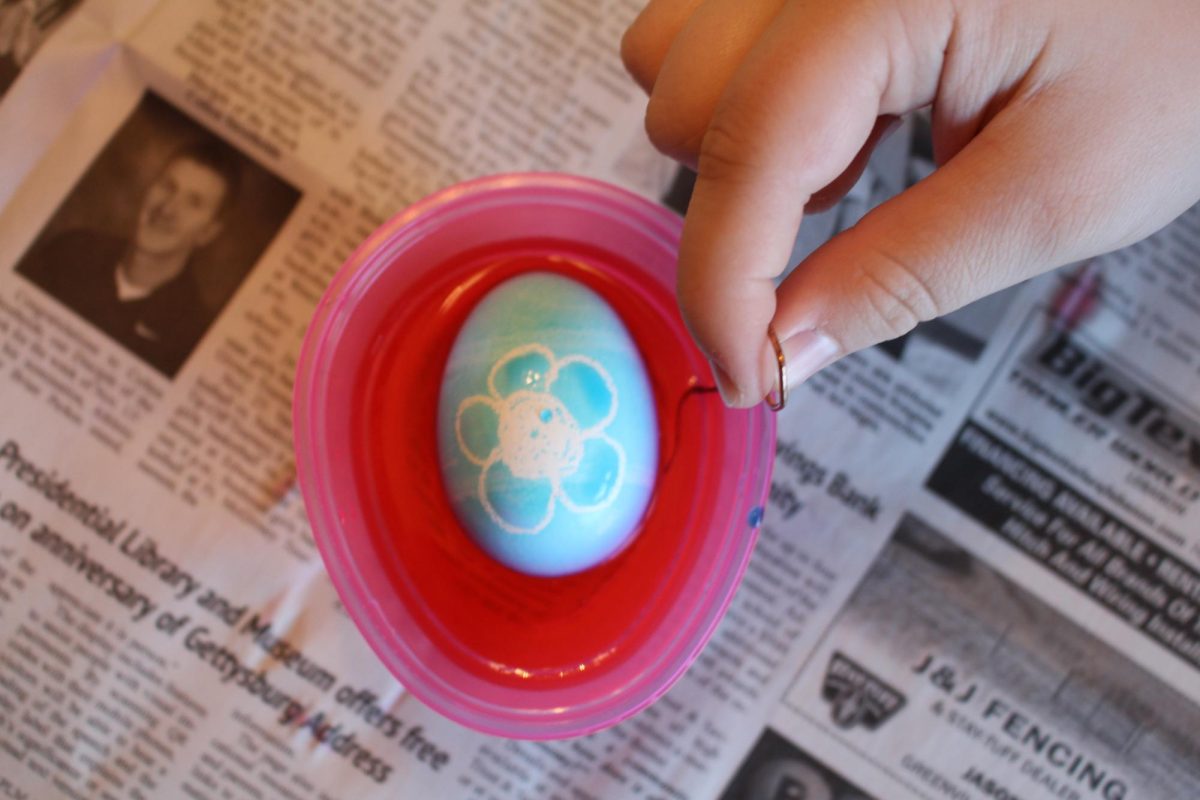
When using the dye it may stain if it comes in contact with skin, fabric or wood. For this reason you may want to wear gloves and lay down newspaper on the surface you are dyeing the eggs on. To dye the eggs use the egg dipper to stabilize the egg then you dip it. The longer you leave the egg in the dye, the darker the color will be. You can either dip the whole egg in one color or you can dip a part of the egg in one color and the other part in another color. To add designs to the eggs, you can use a wax crayon to draw on designs prior to submerging in the dye. While dyeing the eggs don’t be afraid to experiment with the techniques you use and don’t be afraid to make mistakes; the eggs with mistakes are often the best ones.

Step 4: Let the Dye Dry

Once you have put the dye on an egg you need to let the dye dry as it will stain your hands if it is still wet. To save your designs use your egg container that the eggs came in and flip it upside down. Then carefully place the egg on the upside down container. Leave the eggs on the container until they are completely dry.

(Credit to Canyon Dubis)
Step 5: Enjoy
Step+5%3A+Enjoy
(Credit to Canyon Dubis)

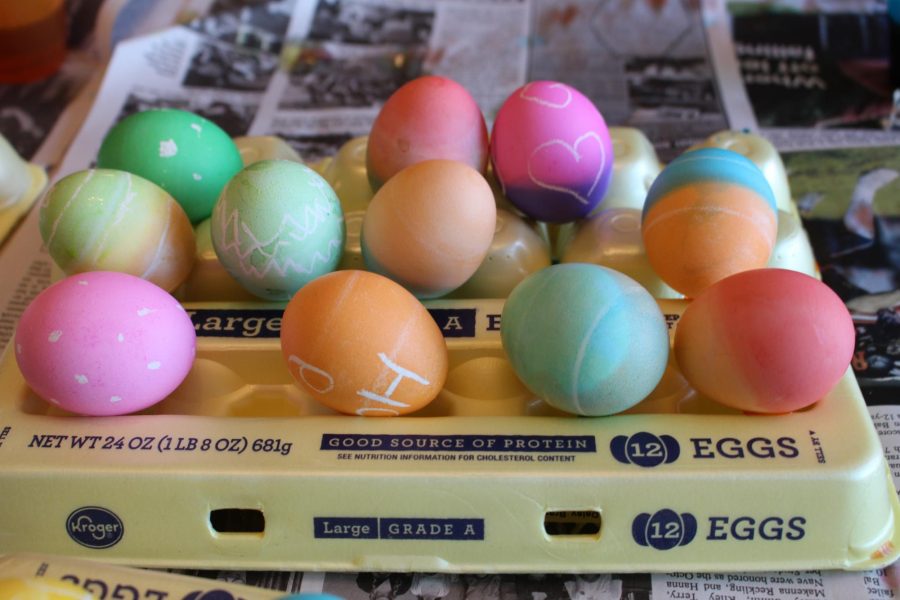
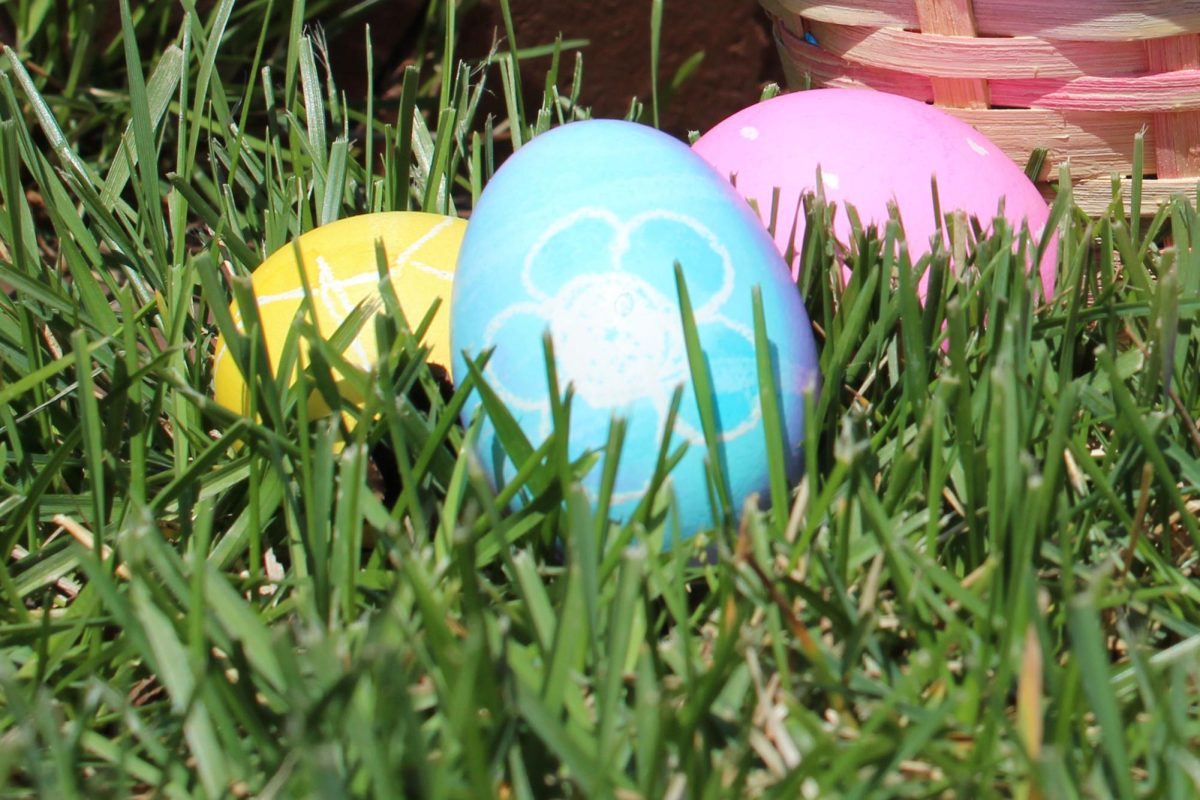
Now you have fun and colorful eggs that you can use in your favorite recipes that require hard boiled eggs or you can lay them in your yard for spring or Easter.

Leave a Comment
Donate to FHNtoday.com
$105
$500
Contributed
Our Goal

Your donation will support the student journalists of Francis Howell North High School. Your contribution will allow us to purchase equipment and cover our annual website hosting costs.

More to Discover
Donate to FHNtoday.com
$105
$500
Contributed
Our Goal

Comments (0)

All FHNtoday.com Picks Reader Picks Sort: Newest

Your email address will not be published. Required fields are marked *